❝
【vue-plugin-hiprint】[1]默认分支是
npm包及demo的融合代码;对于部分新手来说有点难以下手。本篇开始以新的demo开始讲述如何开始使用vue-plugin-hiprint。❞
demo项目通过create-vue[2]创建。默认 vue3。如果你有哪些不清楚的,欢迎各位留言反馈。demo链接见文末。
1.安装
npm i vue-plugin-hiprint
引入「打印样式」print-lock.css
- 从
node_modules/vue-plugin-hiprint/dist/目录下复制一份print-lock.css到静态资源目录public下 - 在
public/index.html中添加样式如下图:
▲添加打印样式
❝
这个
打印样式是必须要引入的,否则会 打印重叠,多出一页。❞
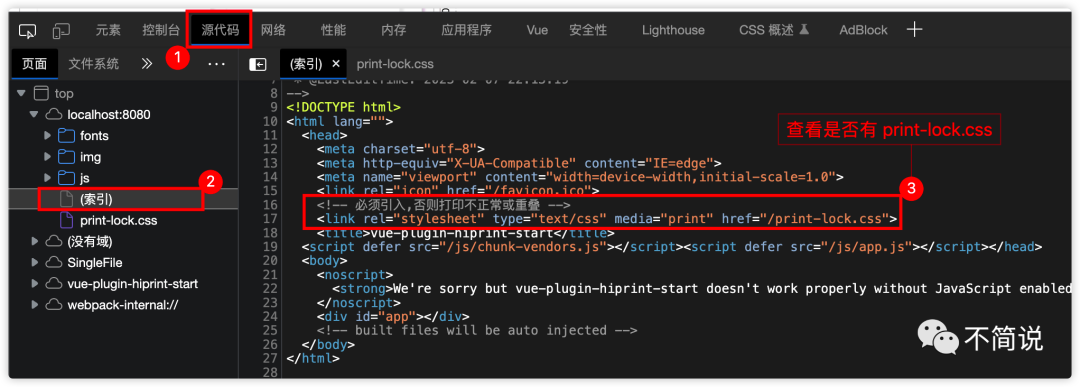
如何检查是否引入成功呢?
- 浏览器
控制台查看
▲控制台查看 html 文件
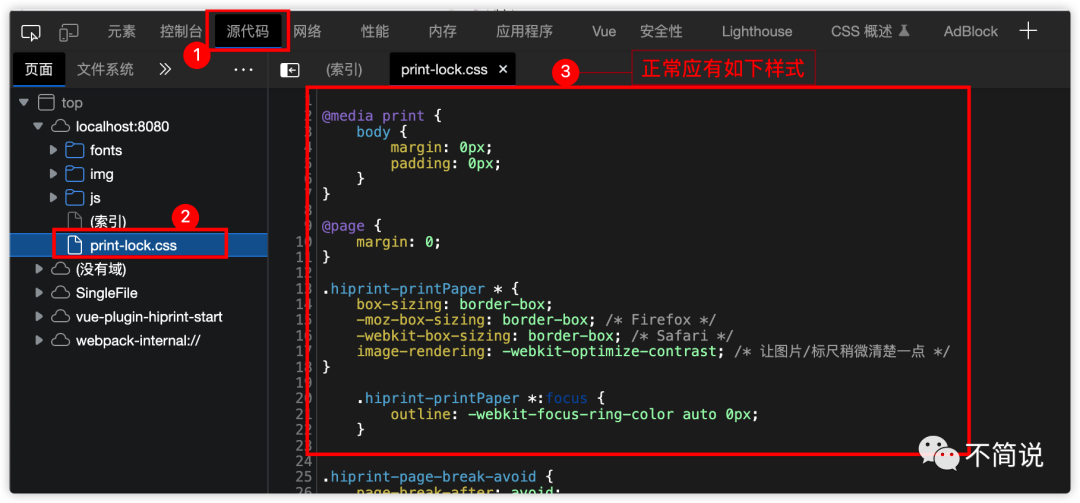
- 查看
print-lock.css样式
▲正常引入效果
2.构建可拖拽元素(自定义显示样式)
这里以默认的 defaultElementTypeProvider 做示例。
❝
如果想知道如何自定义可拖拽元素provider,请查看上一篇文章 【vue-plugin-hiprint】如何自定义可拖拽元素provider
❞
2.1 编写页面
<!-- 样式完全自定义 -->
<div class="flex-row justify-center flex-wrap">
  <div class="title">基础元素</div>
  <!-- tid 与 defaultElementTypeProvider 中对应 -->
  <!-- 包含 class="ep-draggable-item" -->
  <div class="ep-draggable-item item" tid="defaultModule.text">
    <i class="iconfont sv-text" />
    <span>文本</span>
  </div>
  <div class="ep-draggable-item item" tid="defaultModule.image">
    <i class="iconfont sv-image" />
    <span>图片</span>
  </div>
  <div class="ep-draggable-item item" tid="defaultModule.table">
    <i class="iconfont sv-table" />
    <span>表格</span>
  </div>
</div>
注意事项如下:
- 必须先
init对应provider tid与defaultElementTypeProvider中对应- 元素dom 「必须包含」
class="ep-draggable-item"
2.2 初始化provider并构建可拖拽元素
<script setup>
import { onMounted } from"vue";
import { hiprint, defaultElementTypeProvider } from"vue-plugin-hiprint";
// 初始化 provider
hiprint.init({
  providers: [defaultElementTypeProvider()],
});
/**
 * 这里必须要在 onMounted 中去构建 左侧可拖拽元素 或者 设计器
 * 因为都是把元素挂载到对应容器中, 必须要先找到该容器
 */
onMounted(() => {
  buildLeftElement();
});
/**
 * 构建左侧可拖拽元素
 * 注意: 可拖拽元素必须在 hiprint.init() 之后调用
 * 而且 必须包含 class="ep-draggable-item" 否则无法拖拽进设计器
 */
const buildLeftElement = () => {
  // eslint-disable-next-line no-undef
  hiprint.PrintElementTypeManager.buildByHtml($(".ep-draggable-item"));
};
</script>
3.构建设计器
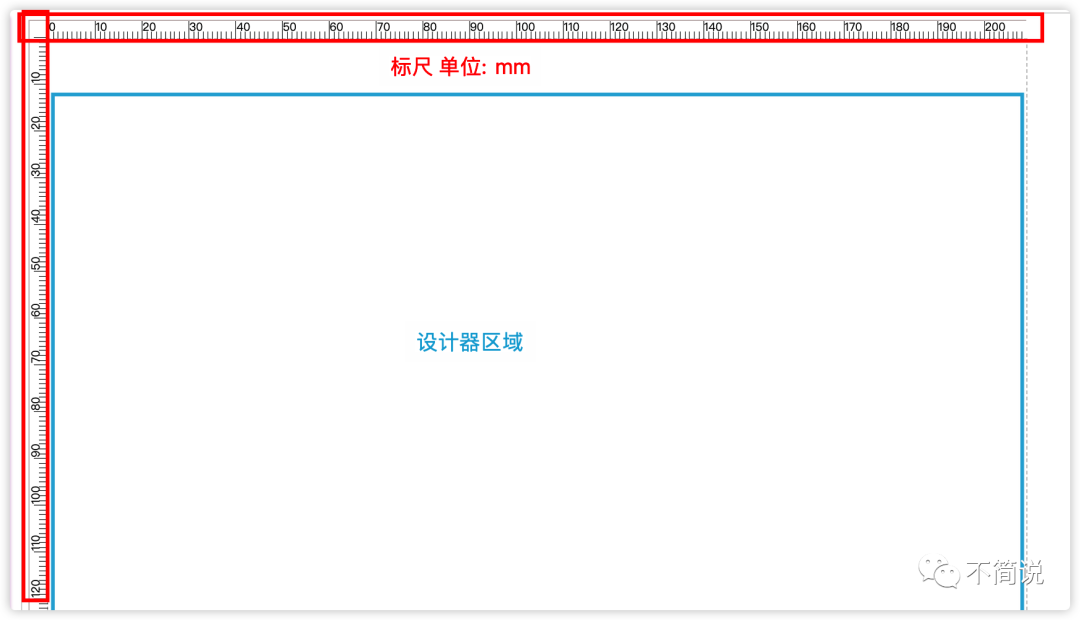
设计器就是打印设计的画布。将元素拖入其中即可开始拖拽设计你的打印模板啦~
首先插入一段 html 如下:
<div class="flex-5 center">
  <!-- 设计器的 容器 -->
  <div id="hiprint-printTemplate"></div>
</div>
然后在对应时机去构建(design)
<script setup>
import { onMounted } from"vue";
import { hiprint, defaultElementTypeProvider } from"vue-plugin-hiprint";

onMounted(() => {
  buildDesigner();
});
/**
 * 构建设计器
 * 注意: 必须要在 onMounted 中去构建
 * 因为都是把元素挂载到对应容器中, 必须要先找到该容器
 */
let hiprintTemplate;
const buildDesigner = () => {
  // eslint-disable-next-line no-undef
  $("#hiprint-printTemplate").empty(); // 先清空, 避免重复构建
  hiprintTemplate = new hiprint.PrintTemplate({
    settingContainer: "#PrintElementOptionSetting", // 元素参数容器
  });
  // 构建 并填充到 容器中
  hiprintTemplate.design("#hiprint-printTemplate");
};
</script>
注意:必须要在 onMounted 中去构建设计器。因为要先查找到该 容器。
其中 hiprintTemplate.design("#hiprint-printTemplate") 就是去执行构建。传入的参数是 jquery[3] 选择器。同理 settingContainer 也是插入 jquery 选择器。
当执行完design后,我们将看到如下:
▲设计器
4.打印
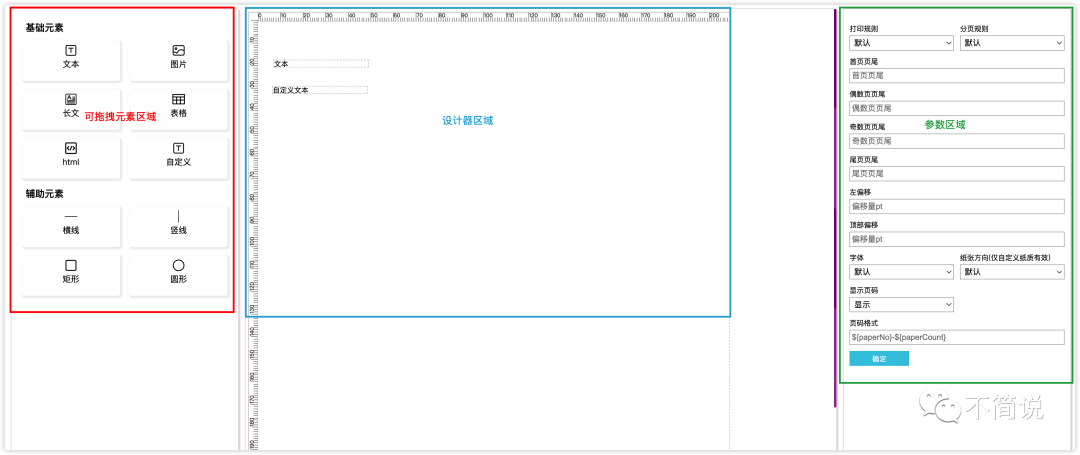
通过前面步骤,我们可以获得如下页面:
▲可拖拽元素、设计器及参数区域
ok,入上图我们已经拖入了两个文本进入了设计器区域
我们来试试打印↓
4.1 浏览器打印
调用浏览器打印功能进行打印:
// 打印数据,key 对应 元素的 字段名
let printData = {name:'CcSimple'};
// 参数: 打印时设置 左偏移量,上偏移量
let options = {leftOffset:-1,topOffset:-1}
// 扩展
let ext = {
  callback: () => {
    console.log('浏览器打印窗口已打开')
  },
  styleHandler: () => {
    // 重写 文本 打印样式
    return'<style>.hiprint-printElement-text{color:red !important;}</style>'
  }
}
// 调用浏览器打印
hiprintTemplate.print(printData,options,ext);
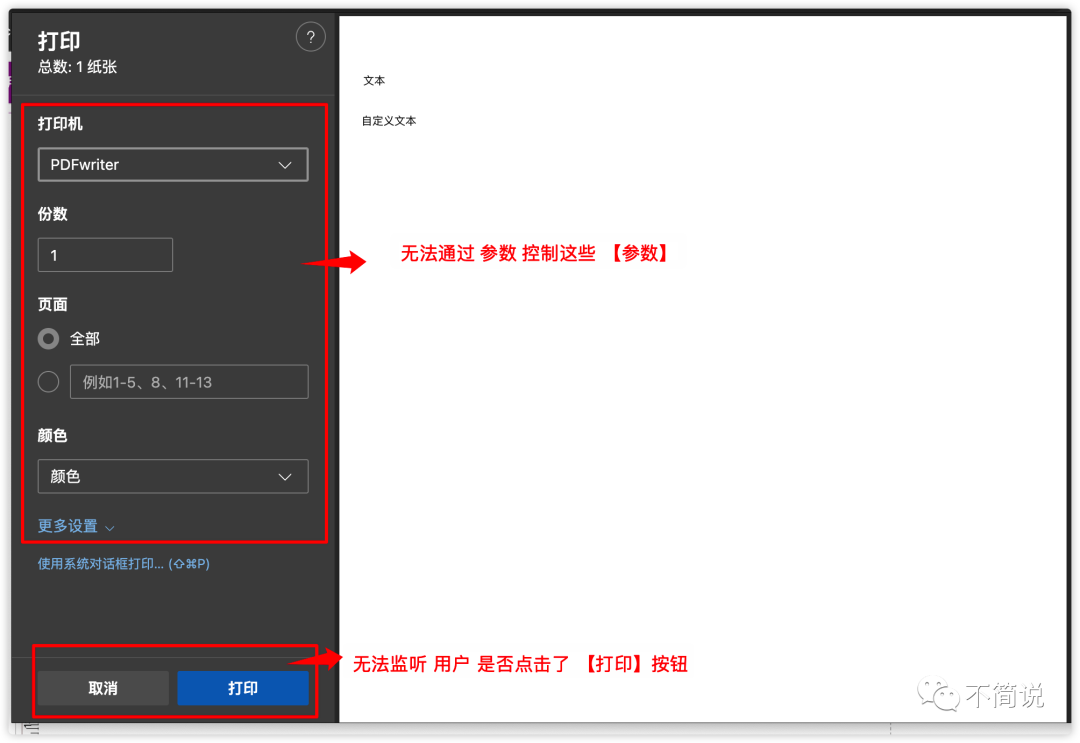
浏览器没有提供相关 API 所以无法监听用户是否点击了打印如下图:
▲浏览器打印
4.2 直接打印
直接打印`就是借助`直接打印客户端(electron)`进行静默打印。可以传入`electron`打印 API 相关参数。可以`监听是否成功传入打印机队列
示例:
const print2 = () => {
  if (hiprint.hiwebSocket.opened) {
    hiprintTemplate.print2({});
  } else {
    alert("请先连接客户端(刷新网页), 然后再点击「直接打印」");
  }
};
❝
print2相关参数较多,
入门篇先不一一列举。在接下来的文章中再详细列举。❞
总结
- 打印样式
print-lock.css必须正确引入 - 构建
可拖拽元素一定要先init相关provider - 构建
可拖拽元素和设计器一定要在挂载完dom后(onMounted)执行
入门篇到此结束,demo中的代码会涉及到很多基础知识,所以一定要学会自己查阅相关资料。
如有不清楚的可以加我微信,记得备注start,我好拉你进群:
▲备注“start”拉你进群
demo源码: https://github.com/CcSimple/vue-plugin-hiprint-start
demo预览: https://ccsimple.github.io/vue-plugin-hiprint-start/
参考资料
[1] vue-plugin-hiprint:https://gitee.com/CcSimple/vue-plugin-hiprint
[2] create-vue:https://github.com/vuejs/create-vue
[3] jquery:https://jquery.com/
原文标题:【vue-plugin-hiprint】使用-入门篇
原文链接:【vue-plugin-hiprint】使用-入门篇
原文快照:【vue-plugin-hiprint】使用-入门篇 - PDF


文章评论